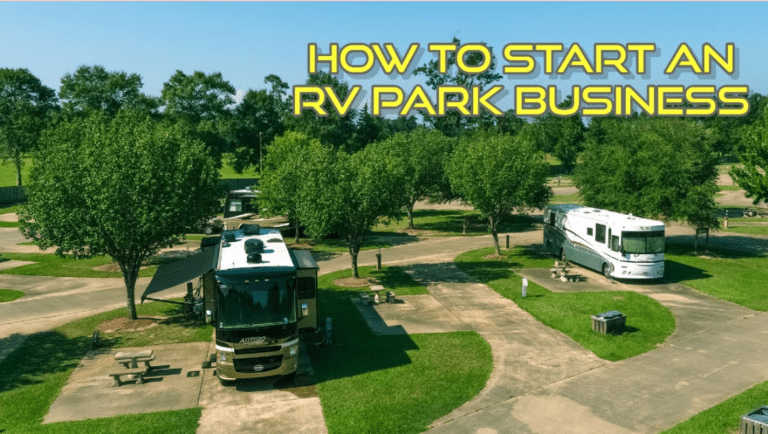
Killer RV upgrades to make it feel like home.
killer RV upgrades
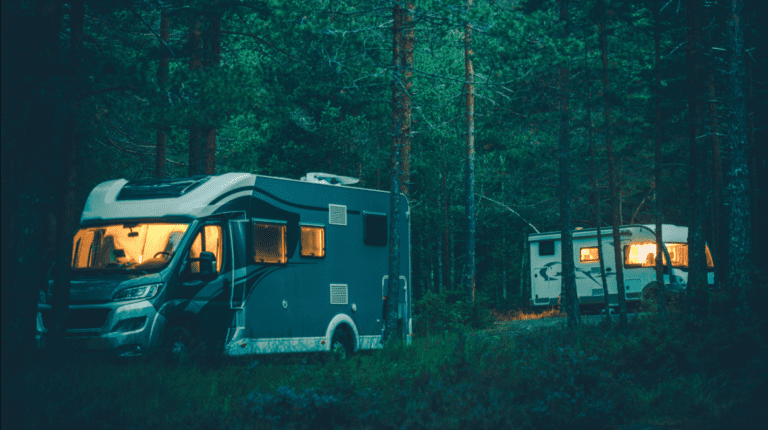
The RV lifestyle isn’t for everyone, but anyone who’s lived in a factory-issued one knows that remodeling is needed to fit your style. About three years ago we decided to invest in a travel trailer. While I like to rough it, I’d rather be in a hammock over a tent any day. Unfortunately, it does not work well with a family and dogs. And sometimes it’s nice to drag your hotel with you wherever you go. The best thing about having a travel trailer is that it is lightweight. And if you make some killer RV upgrades, you’ll realize it’s not going to be home at some point.
This post is sponsored by DayTripper. You may be surprised to know that DayTripper sponsors 95% of the posts seen on the site. There may be affiliate links within the post. Clicking on them won’t cost you much. I earn a small commission on any purchase. I don’t promote things I don’t stand behind.
The first thing we noticed after getting home was that the factory model RV needed a little work. Things were not to our liking and even the craftsmanship from the RV manufacturer was not what we were expecting. We blew it on “we got the cheapest model”. Come to find out the next year after my parents bought a more expensive model, and they had the same problems. After three years of minor adjustments to make it feel homey, we decided to pull the trigger and upgrade to the killer RV we’ve been dreaming of.
- Show contents.
- Killer RV upgrades and mods you need to make.
- Outdoor RV Upgrades
- Drill adapter for jack
- The first two times we used the handy crank tool we were given to raise and lower the jacks on the RV. Then someone pulls up to us and we watch him get out his drill and get all the jacks down in a minute. If you can only afford one job, get a leveling scissor jack drill adapter. Believe me!
RV step cover
It is important to keep the dirt down in small spaces. That’s why you need an RV step cover. We tried doing without but finally decided enough was enough. We needed to hide these steps to keep some of the dirt out. It works really well. You can buy them online or make them yourself like I did.(10 minute upgrade for purchase) (45 minute upgrade for DIY)
RV step cover
Expandable flexible water hose
I had no idea how much space a traditional water hose took up. That was until we swapped ours for an expandable flexible water hose. The whole thing fits inside a shoe box. The front nozzle has an on/off trigger so we have more control over the water going in and it prevents overflow. It saves weight and space.(5 minute upgrade)
RV Gunnalbins
The glove holder
To keep everything organized and make the dump station a better experience, we added a glove box holder inside the camper gunnel. We always know where our gloves are now.(5 minute upgrade)
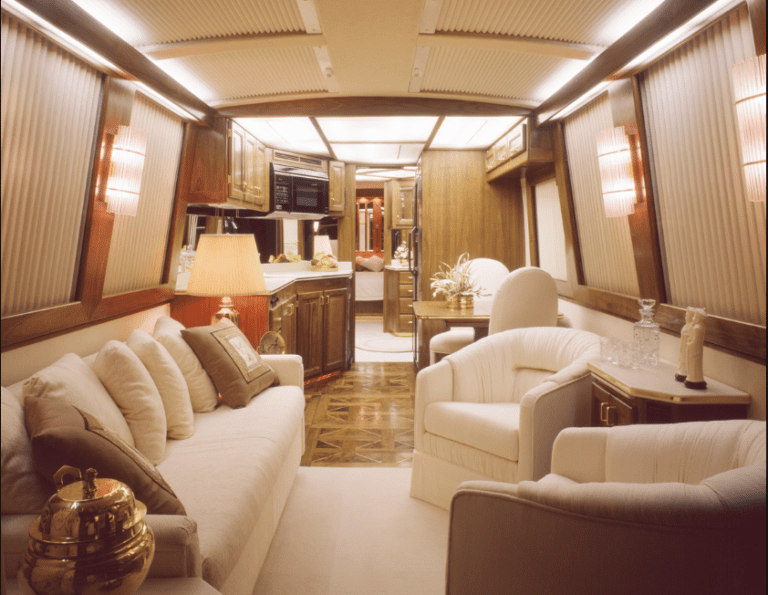
Lighting the interior of an RV
Paint the RV walls.
Painting the walls of your RV is something that goes from a factory feel to a homely feel. It was this that inspired this year’s killer RV upgrade. When I first decided to paint a perfectly nice wall in my camper, I was a little nervous. Why exactly good wallpaper paint? The wallpaper is what sets the tone for their space and gives it an intimate feel.
I couldn’t be happier with the results. Choosing to go with white opened up the space a lot. We started with a little TSP to clean all surfaces, then sanded the wallpaper with a block. One coat of primer followed by three coats of white. I’m sure everyone knows how to paint so I won’t bore you with the details. But I have a tip, take your time and have some fun. Our entire camper went from dirty and dark to bright and inviting.(5 hours upgrade + drying time)

- 27 RV upgrades are too good to pass up.
- Get a new RV mattress.
- Ditch the rug.
- Solar energy
- Wireless RV Backup Camera
- Let there be light under the bed
- Counter extensions
- Chalkboard fridge door
- New storage bay locks
- Turn off your lights.
- Bulk up your inverter.
- Increase your battery capacity.
- Digital thermostat
- DIY towel rack
- Shoe storage
- Replace your shower (and faucet) heads.
- Garbage removal
- Bumper mount
- Unlimited Wi-Fi
- Better stability
- New and improved shelving
- Shampoo and conditioner holder
- Create the perfect workplace
- Under the counter spice rack
- Upgrade your sewer system.
- RVSkampcan (must!)
- Upgraded vent fans.
- Headphone jacks for your TV
- Result
- The Dirt Camping App
- Find free camping with the public land map.
- Up to 40% off select campgrounds
- First 30 days free with code “TWRV”.
- Recommended
- The Dirt Camping App
- Check the price.
Note: Some links in this article are affiliate links. It doesn’t cost you more than usual. Read our disclaimer for more information.
27 RV upgrades are too good to pass up.
Here are the killer RV upgrades we found:
1. Get a new RV mattress.
- Custom RV mattress
- 3 Choices: Value, Premium or Dual Zone Adjustable
- Fits in any RV.
- Much more comfortable than traditional RV mattresses!
- Recommended
- Tochta Utopia RV mattress
- Check the price.
- Custom RV mattress
- 3 Choices: Value, Premium or Dual Zone Adjustable
- Fits in any RV.
- Much more comfortable than traditional RV mattresses!
- Time to complete: Less than 10 minutes
- Difficulty: Easy
- Cost: $199-$496+
- If you’ve spent any amount of time in an RV, you know the mattress they come with is… pretty cool.
- Fortunately, there are custom RV mattress companies like Mattress Insider! They can make you a mattress to match any RV, camper, or travel trailer. And they have three options:
- A premium mattress (still better than the one your RV came with).
- A premium memory foam mattress.
- A luxury mattress.
2. Ditch the rug.
- RV flooring
- Time to complete: 2+ hours (depending on how big your RV is)
- Difficulty: Difficulty
- Cost: About $2-$5 per square foot
- Whether you buy a new or used RV, the first thing I would recommend is ditching the carpet. Laminate floors are easy to clean and, in my opinion, they look much better.
- Think about where you will be traveling. Mountains? the beach? Wherever you go, chances are you’ll bring dirt (or sand) into your RV. These mites can get stuck under your carpet and be a royal pain to get out.
- Our friends at the Fun Times Guide explain how to properly remove RV carpet.
3. Solar energy
- Solar Panel.Time to complete: Less than 2 hours
- Difficulty: Medium
- Cost: $500+
- If you’re a big fan of boondocking (or interested in trying it out), I’d recommend getting a few solar panels for the roof of your RV.
- These solar panels will not only charge your RV battery while boondocking, but they also harvest clean energy from the sun, reducing our dependence on fossil fuels.
- Check out this guide by Conor McMillen of Thriving Minimalist to learn how to install a solar panel kit on your rig!
4. Wireless RV Backup Camera
- Backup cameras
- Time to complete: Less than 10 minutes
- Difficulty: Medium
- Cost: $50-$400 (depending on quality and number of cameras)
- Want to check out some of the best RV backup cameras in 2021?
- Click here!
- Getting back into the campground site is a pain in the butt. Hell, backing up anywhere in an RV is a pain! (Don’t even get me started on fifth wheels.)
- While the rearview camera may be a little pricey, it’s definitely an RV product for those who feel a little uncomfortable backing into tight corners.
- There are many rear view cameras that you can buy, but here is the best rated camera on Amazon.
5. Let there be light under the bed
- LED string lights
- Time to complete: Less than 10 minutes
- Difficulty: Easy
- Cost: About $10+
- In most RVs, the master bed lifts up and has extra storage space – score!
- However… there is no light bulb under the bed (because, why would there be, right?).
- Installing lighting (or a row of LED string lights) will help you find your way when it’s a little dark outside. Especially if you have toys and like to take your toys out at night.
- You can also put some nice colored lights under your awning to give it some better light at night (or throw a great RV happy hour at the campground).
6. Counter extensions
- Counter extension
- Time to complete: 20-30 minutes
- Difficulty: Medium
- Cost: $15+
- My biggest gripe when it comes to RVs is the lack of counter space in the kitchen. I love to cook (I even created a cooking blog to share my recipes with the world).
- Some fifth wheels have an island that gives you more space to prepare and cook your meals, but the Class As, Bs, and Cs barely have any extra room. This is why counter extensions are a great buy.
- Oak accent these counter extensions.
9. Turn off your lights.
- LED lights
- Time to complete: Less than 10 minutes
- Difficulty: Easy
- Cost: $10+
- LED light bulbs use 90% less electricity than incandescent bulbs and have a lifespan of up to 22 years.
- They are also environmentally friendly, 100% recyclable, dimmable, and produce very little infrared light.
- If I were you (and didn’t already have LED lights), I would get some LED lights today.
10. Bulk up your inverter.
- RV inverter
- Time to complete: About an hour
- Difficulty: Difficulty
- Cost: $100+
- Like a solar panel, this is another essential item for those interested in boondocking or dry camping. Bulking up your RV or travel trailer inverter will allow you to store electricity for longer.
- Take a look at this video to better understand how to upgrade your new inverter:
11. Increase your battery capacity.
- RV battery
- Completion Time: Depends on how many batteries you decide to get!
- Difficulty: Medium Hard
- Cost: $115+
- While most RVs come with two heavy-duty batteries, some people need more (I’m talking to you, boondockers).
- It’s pretty self-explanatory why you want multiple batteries when traveling – you don’t want to run out of power!
- Besides, it doesn’t hurt to have backup batteries, right?
- These batteries are fantastic and definitely worth the price. If you need help installing them, check out this guide.
- Quick RV Tip: Even if you don’t want to max out your battery life – we recommend buying at least one (if not two) spare batteries before you hit the road. You never know when you’ll need it!
- Related Post –
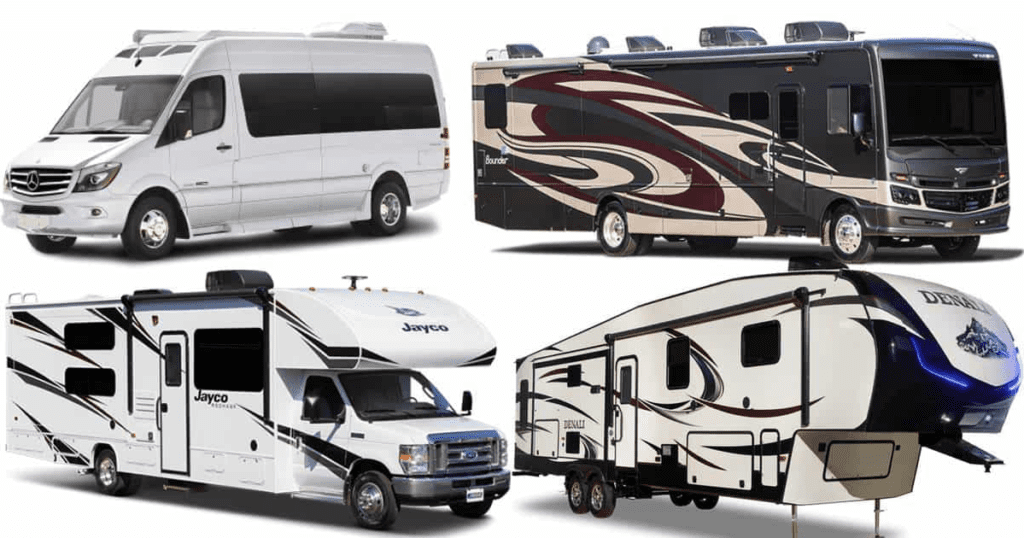
Types of Campers: Which RV is Right for You?
12. Digital thermostat
- RV thermostat
- Time to complete: Less than 2 hours
- Difficulty: Medium
- Cost: $75+
- A digital thermostat is able to give you more power (and more accurate) temperature control in your RV.
- Unless you buy a brand new RV with the latest thermostat, you’ll likely have a runky dunk that doesn’t always adjust to the correct temperature.
- Although there are many thermostats to choose from, we recommend this one.
13. DIY towel rack
- DIY towel rack
- Time to complete: Less than 5 minutes
- Difficulty: Easy
- Cost: $3+
- You may have seen it in our RV accessories post – but it’s one we can’t leave out here.
- Besides kitchen counter malfunctions, RV manufacturers never put enough towel racks in the bathroom!
- I’m not complaining though. Towel holders are incredibly easy to install and are extremely inexpensive. Some towel holders just hang over the door!
- There are tons you can choose from, but Bill and I went with this particular one.
14. Shoe storage
- DIY shoe rack
- Time to complete: 10 minutes
- Difficulty: Easy
- Cost: $5+
- Guys… this is a game changer. Do you know how many times Bill and I have flipped each other’s shoes? Not anymore!
- Installation of this shoe rack was also stupid easy.
- We bought a small coat rack and hung our shoes on it! We totally recommend this for RVers who have a lot of shoes (especially anyone with kids who tend to leave their shoes around).
15. Replace your shower (and faucet) heads.
- Shower head
- Time to complete: Less than 1 hour
- Difficulty: Medium
- Cost: $10+
- I don’t know about you, but I love taking long showers. Hot water is great but the water pressure makes me want to stay inside.
- RV shower heads are terrible. Water pressure is dim and, in our case, there was only one setting to choose from.
- what is the meaning of this? Upgrade! This shower head worked perfectly for us – but there are so many to choose from!
16. Garbage removal
- RV garbage
- Time to complete: Less than 20 minutes
- Difficulty: Easy
- Cost: $20+
- Finding a good place to put your trash in your RV can be a big pain in the butt. However, this under-the-counter mod is easy to install and will come in handy whether you’re on the road or out!
- Trust me… you don’t want to be that person who forgets your entire garbage is still out in your kitchen while you’re traveling down the highway…
- This garbage disposal is what we use now and we love it!
- (If you don’t have shelf space for a pull-out can, you can also install bungee cords to hold your trash, as we describe in our RV organization guide.)
17. Bumper mount
- RV Bumper Mount
- Time to complete: Less than 2 hours
- Difficulty: Medium
- Cost: $100+
- If you are not towing a car behind your RV, a bumper mount may be the best option for you.
- These are perfect for storing extra totes, bikes, even kayaks!
- This bumper mount is one of the best and holds up to 600 lbs. We definitely recommend picking one up for yourself – you never know when you might need it!
- 18. Unlimited Wi-Fi
- RoadLink Unlimited RV Wi-Fi
- Get WiFi from almost anywhere!
- Unlimited data plans starting at just $30 per month.
- Easy to install.
- Recommended
- Roadlink RV Wi-Fi Booster
- Check the price.
- Code “WANDERINGRV” for 1 year of Road Trappers Plus
Painting the RV
Add custom curtains and tracks.
Sometimes you need a little extra privacy when you’re close together. I’m not sure why but travel trailers and RVs don’t always come with these luxuries. With the addition of some inexpensive curtain tracks, you can add to your set of curtains. The track was easy to install and screwed into the top of the roof. It comes with all the hooks needed to hang your curtains.
Instead of buying fancy curtains at the store, I swing by a fabric store and get my favorite type of fabric, ripstop. This stuff worked great because it was lightweight and I could get it for around $6 a yard. There was plenty left to redo the valances too. I spend about $30 on fabric. If you have a sewing machine, please make your own curtains. Not only will it be a color you love, but it was super easy. I cut out a panel, and did a sharp hem on all sides. Then the curtain.
Functional RV Upgrades
Occupancy of bench seat
It was the first thing to do when we pulled it into the driveway. When we went to open the seats under the dinette, it was a floating board. I can’t tell you how crazy a floating board makes me. Before you hit the road, add a hinge to secure it in place.(15 minute upgrade)
USB ports
Update electrical plugs to USB ports. RV life is not life without power. Let’s face it with most people using charging ports for phones and tablets, having a few extra USB ports around is invaluable. Instead of plugging in bulky adapters, we swapped the outlets for outlets with USB ports. Check the depth of your existing outlets before buying. The walls of a camper are thinner than the walls of your house.
We also got extra long USB cords for all our devices. That way we can plug in and get our nightly tech fix. I also recommend keeping a dedicated set of cords in the camper so they are never forgotten. No more fights at the shops or who gets which cord.(45 minute upgrade)
RV USB Power Ports
Add a bar to the door.
Add a bar at the door. It was something my husband insisted I didn’t know we needed either. The bar sits just above the handle. He gave the door some more pressure. I’ve been using it to open and close the screen door without even thinking about it.(10 minute upgrade)
Bar for screen door
Keyless entry door lock
This is one of the most interesting updates. I can’t tell you how many extra trips I’ve made to the garage looking for camper keys. A keyless entry door lock on the door allows any family member to quickly lock or unlock the front door. No more trying to remember how to turn a key. It drove me crazy. Also, the keyless entry door lock comes with a keyfob so that we can lock the door when we are taking it in the car.
8 Killer DIY Camper and RV Upgrade Projects
- JIM10 JUNE 2021VAN BUILD1 Comment
- I love doing clever DIY RV upgrades around my camper to make it better, more comfortable or add some functionality it never had before.
- So if you’re like me and can’t afford an RV with every little upgrade and improvement.
- Or if you’re someone who’s built their own VanLife Camper and want some inspiration for some small projects you can do to make your van a little more comfortable and livable, I’ve got you covered. Here are some great tips.
- These are all things I’ve done with my camper, some harder than others and I’ve tried to include some information about each one that might give you some more information on what each one does. How long does it take?
- Camper Upgrade 1: Automatic Fridge Cooling Fan
- Automatic Refrigerator Fan DIY RV Upgrade Project
- Price: Under $50 (can be as low as $20)
- Installation time: 2-3 hours
- Benefits: Reduce the amount of LPG or power required to run your fridge, maintain a consistent temperature, monitor your fridge temperature so you know it’s always perfect.
- If you have an absorption fridge, you know the 3-way fridge that constantly changes temperature unless you’re checking it all the time, forever cold, cold spots inside. And there are hot spots, and the freezer never works properly. Yes that one, I have found a way to tame most of the beast and make it more efficient.
- Well I do, and I will eventually change it to a compressor fridge but I just found a better option.
Install.
I have installed 3 computer fans that are only about 0.5A maximum controlled by a thermostat that shows the temperature in the fridge. The thermostat and fan cost a total of $20, then all it took was a little time and a few zip ties to install.
The first, and perhaps most important fan is the one inside the refrigerator. You can see it in the first picture and it is an 80mm computer fan. It circulates the air around the inside of the fridge which cools everything down faster and also improves the efficiency of the fridge.
Note: Another thing I’ve done to improve the function of the fridge is to remove the freezer door as it’s too small and doesn’t really work very well as a freezer and use it to hold some beer. are (about icy cold 30 minutes ). This is where the fan sits inside the fridge and it greatly improves the cooling capacity of the fridge. You just have to be okay with not having a freezer.
The second fan is on the exhaust vent at the back of the refrigerator to blow out the hot air. This fan pulls hot air out of the back of the fridge and draws in cool air from the bottom vents, helping to lower the temperature.
Camper Upgrade Fridge Cooling Fans.
Finally, the third fan is attached to the radiator on the back of the refrigerator at the top. This helps cool the refrigerant as much as possible before it goes back inside the refrigerator. Refrigerate once more.
RV Upgrade Refrigerator Fans
To install these two fans you just need to run the cables from the controller to where the fan will be placed and use some zip ties to hold them in place.
All three fans are connected to a small thermostat that displays the temperature inside the fridge, it is set to 2.5°C so it turns the fan on at 4.5°C until the temperature goes back to 2.5°C. Goes and then turns them off. . . It shows you the current temperature in the fridge so you always know it’s a good safe temperature.
- Parts and materials
- Computer fans
- Automatic temperature switch
- RV Upgrade 2: DY RV Vent Fan
- Killer RV Upgrade Ceiling Ventilation Fan
- Price: $30-50 depending on material choice and price.
- Installation time: 3-4 hours (depending on the van and how professional you want it to look)
- Our little camper, Bill, is pretty well insulated with 25mm or 1 inch insulation in all the walls, floor and ceiling and that helps a lot with maintaining the temperature. Great in winter when you want to keep it warm inside. But not so much in summer when you want to cool down at night.
- If your van doesn’t have air conditioning, this ventilation fan project can help you a lot.
- Find the biggest fans you can fit in your ceiling openings, I have found 200mm fans are great as they are very quiet and move a large amount of air for very little power. They are just computer fans and the good thing about computer fans is that they have a lifetime. They are meant to last for years and years and if you get some good quality ones you probably won’t need to replace them.
- We run these fans 24 hours a day for weeks at a time when it’s hot and it’s never a problem.
Installation
I simply took the molding that held the mosquito net from the ceiling holes, measured it, and replaced the mosquito net with a piece of plexiglass with all the screw holes and the large hole for the fan. was Metallic ,
Once I cut the correct size hole in the water heater and installed the fitting, I connected the exhaust pipe from the diesel heater to the water heater and that was it. The exhaust from the diesel heater goes where the gas burner is in the water heater then the normal exhaust goes out for the water heater. You can see the installation of the exhaust in the water heater in two pictures here.
Then once these other parts are done it’s time to test the heater. I did this before proceeding to make sure everything was working properly.
Finally, you need to run the heater output hose to the places in the camper where you want the heat to go. This varies depending on the camper and I found it quite difficult to install as I had very little room for hoses and any outlets as our camper is quite small.
Diesel heater for vans
Here is the complete diesel heater installation in my van. You can see that the fuel pump is mounted on the soft rear wall. The exhaust goes back to the bottom of the camper water heater.
Parts and materials
Diesel heater and installation kit. (These vary so you will need to work out the one that suits your van for installation).
- Carbon monoxide/smoke alarms
- Camper Upgrade 4: Cigarette lighter plugs and USB chargers
- Car USB chargers
- Price: $30 – $100
- Installation time: 1-2 hours
It really depends on your camper and its power socket availability. Also how many things do you have to charge or run from 12V? Almost all devices we have are powered by 12V, including our laptops which are powered by 12V power supplies. I got these because they are much more efficient than using an inverter and my normal wall chargers.
So really it involves digging some holes, running some cables and doing some basic electrical work.
Make sure all your sockets have fuses, 15A per power socket and cable is good as most of these sockets are designed to work up to 10A and this will give you a bit of headroom for that. .
Apart from the 12V socket, another thing that has been very helpful is the inbuilt USB ports, especially for charging high-powered ones. Many devices come with high-power fast charging and some require it, like tablets. This is where dedicated high power sockets will really come in handy. Especially if you have a USB-C fast charge device, you’ll be able to get a good charge fast when you need it.
This is really easy if you already have a fuse box with some extra space. You can also wire them to a switch but if you do you’ll want to run them with relays unless you can find a switch that can handle 10A/20A or more to support all your sockets. Carry more amps than If you have 4 sockets and only one small switch I would suggest grabbing 2x20A relays with two sockets connected to each. Or play them directly.
The last thing is the cable, you need some decent thickness of the cable, firstly so that the devices connected to them can draw enough power from the battery without the voltage dropping too much and also that they don’t drop too much. Hot.
- Parts and materials
- 12V auto socket
- USB socket
- High power inbuilt USB-C charger
- 10A cable
- Fuse / fuse box
- Relays (optional 10A capacity each)
- switch (optional)
- RV Mod 5: Temperature / Weather Station
- Weather station for rv
- Cost: $20 (cost of your thermometer or weather station only)
- Installation Time: Less than 1 hour
This is really one of the most basic installations you can do but it’s good to know the temperature inside and outside your van. After installing one of these you will know the temperature better and you will have a better idea of what the climate might be like in an area. You’ll also have a better idea of what to wear today so you’re not too hot or too cold.
For this install just figure out where you want to install your temperature sensor and where you can run the cable to install the outside sensor. The best place for this sensor to give you a very accurate reading is under your van, completely out of the sun. This will give you a very accurate air temperature reading without the influence of heat from the sun.
So find a way to run it down inside a wall or closet, drill a small hole in the floor, big enough to fit the sensor. The zip then attaches the sensor to a component on the bottom of the van to hold it in place. Clean up your cable management with some zip ties and block the hole with a little sealant and you’re done.
Very easy and very useful.
- Parts and materials
- Temperature stimulus
- Camper Mod 6: Lighting Upgrade
- Clever RV Modifications
- Cost: Under $50 (depending on how much you need)
- Installation time: ½ to 1 day (depending on type of installation)
- Lighting in the van can make the camper either feel like you’re actually camping with headlamps or some scary lighting around you, or it can feel like a cozy place where you can read. There is enough light.
- Let’s talk RV upgrades. These things will keep you organized, make daily routines run smoothly, and make life on the road easier.
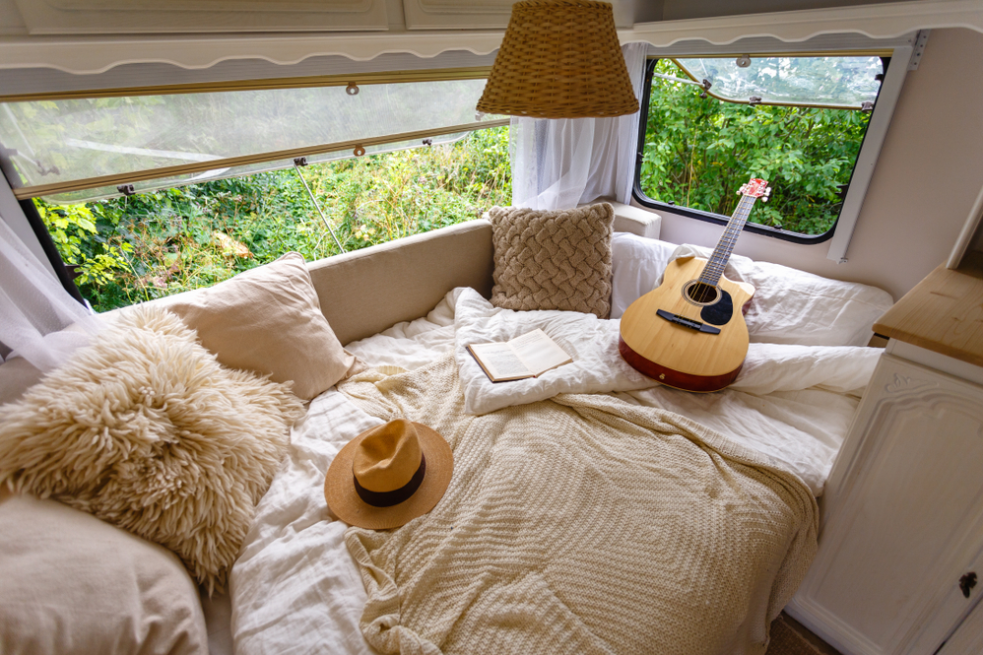
- Now more than ever, individuals, couples and families are hitting the road with their campers. Once you’ve got the basics down for camping, you can now focus on adding the comforts of home.
- Here is a list of the top products we use with our campers. And we only recommend items we use and love. Our goal is to give you a starting point so you can turn your camper into your own safe, organized and practical oasis.
- View Contents [show]
Killer RV Upgrades at a Glance
You’ll find everything on our top entry camper upgrade list here. Keep scrolling to see specific items and why we recommend them.
- organization
- Hicks
- the boxes
- Baskets
- space
- The kitchen
- Paper towel holder
- Plates
- Drying rack
- Cookware Distributors
- coffee maker
- to grind
- Instant pot
- Bathroom
- Microfiber towels.
- Shower head
- Folding stool
- Toilet paper
- living room
- Space heater
Dehumidifier
- Weather station.The perfect RV upgrade for your interior
- organization
- Command hooks and Velcro
- We use command hooks and velcro strips everywhere! A variety of sizes allow you to use them for hanging coats, hats, keys, jewelry, bath towels, and wall decor and electronics.
- All our hooks are clear, so they blend into the wall or cabinets and don’t stick out (the tape is clear too).Great for: Keys, sun hats with straps
- View on Amazon
- Great for: Keeping cords tidy
· Plastic boxes/containers
- These are hard plastic containers, and we found great uses for them in bathroom cabinets, the pantry, and the refrigerator. You will need to measure the correct size and quantity.
- We use these containers to keep our items and food from sliding around and ending up in a huge messy pile.Again, we went with clear bins to easily identify content for quick and easy access. It’s also useful for seeing what groceries you need!
- Note: The link below will take you to boxes of different shapes and sizes.View on Amazon
Flexible baskets
- Flexibility is the key! These flexible baskets are for those oddly shaped cabinets. We use these baskets in bedroom closets, above the dining room table, and in crazy slim cabinets next to our fireplace.
- Baskets keep our clothes and school folders in place, so we don’t have to hunt for what we want.
- View on Amazon
- View on Amazon
- Vacuum
- Cordless Dyson vacuums have made our lives so much easier! The small vacuum makes it easy to store, and it’s very powerful. Dirt, dust, hair, food all do not get a chance.
- Kids (or pets) tracking the mess? No problem with this gap!
- The kitchen
- Paper towel holder
- Simple but essential. This low-profile holder keeps paper towels in place with easy replacement and frees up counter space!We also used command velcro strips to hang it up, and it’s holding on tight.
Plates
You need pots that won’t crack or break from bumpy roads. It will not. They are BPA free and dishwasher and microwave safe.
Collapsible drying dish rack
This collapsible drying dish rack fits perfectly in our sink. The lip rests on the edge of our sink, leaving room to wash dishes, then lay them out to dry while the water runs into the sink. No need for counter space!
Cookware Divider Protectors
Whenever you’re traveling with your RV, everything inside it moves and vibrates. Protect your pots and pans with these dividers.
Made of felt, they prevent your cookware from rubbing against each other and making a racket during travel.coffee maker
Matt loves his coffee, and this compact coffee maker is quick and easy to get your morning caffeine fix. So easy that our daughter makes coffee for it every morning.We love this mister coffee. It is fast and easy to use. We even leave it on the counter while traveling, and it doesn’t move.
The griddle
Our grill has made thousands of chocolate chip pancakes. I swear our girls can’t live without pancakes! We have also used this grill for hamburgers and hot dogs instead of grilling.
Instant pot with air fryer lid
The Instant Pot has been a lifesaver for us. We cook at home all the time, and the RV oven isn’t very reliable, so we use the Instant Pot. Now you can also use the Instant Pot as an air fryer with the air fryer lid. Save space with this combo machine instead of carrying multiple small appliances – whose camper has room for them all?
I’ve made casseroles with banana bread in it, saving us time and money from eating out or waiting for the oven to heat up.
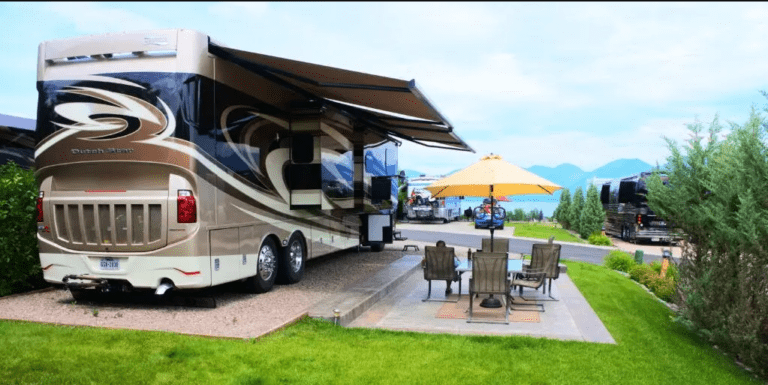
Many people enjoy the joy and freedom of RVing. An exciting way to travel at your own pace with many of the comforts of home is just one reason why people are investing in RVs, buses and campers.
RV Upgrades
Whether you buy a $10,000 travel trailer or a $200,000+ Class A motorhome, there are some amazing upgrades available to help you customize your RV to your needs while protecting your investment. Here are some tips to consider as we head into warmer weather and peak RVing season.
RV Safety Upgrades
Of course, you’ll have a fire extinguisher and first aid kit—among other safety necessities—up to date and ready to go, but you’ll want to improve the safety and comfort of your RV and those who share it. Can upgrade. . With you, as well as around you.
Dehumidifier
Campers are not well insulated, and humidity builds up quickly. A dehumidifier is essential to help keep your camper mold-free. Whenever we notice our RV windows fogging up, we make sure our dehumidifier is on.This dehumidifier is quiet and small, so it doesn’t take up much of your counter space.
You may also want to make a habit of opening cabinets on very humid days to prevent water from collecting in unseen corners. Mold is not good for anyone.Get the most accurate weather information for your camper with a weather station. This will help you monitor the temperature and humidity inside and outside.
Inside, we have the monitor velcroed to the wall next to the door, and the outdoor sensor is velcroed to the exterior of our camper. Neither has increased full-time travel and is one of our favorite upgrades because we don’t have to rely on the internet or cell service to get accurate weather information.Now that you have what you need to upgrade your camping experience for comfort and convenience, you don’t want to forget these important things:
Interior RV Upgrades: More Tips and Tricks
Now that you have all the comforts of home in your RV, here are a few more tips and tricks to help you get started or set up camp.A maroon pickup truck and a fifth-wheel camper are parked on the shore of a lake.Check under the mattress.
No, you are not looking for monsters, but you are looking for mold (another type of monster) that can destroy your RV. Moisture collects in corners inside your camper, especially on slide areas. So, you want to check under them periodically to make sure no mold is growing.
You can also elevate your mattress with some railboards (to allow air to pass through and keep the area dry) or place a mold barrier under your bed.Follow the “leave no trace” rule.
When you get out into nature for your camping and RVing experiences, it’s important to follow the principles of “Leave No Trace” so that others can enjoy the same beautiful places. Let’s take pictures and leave only footprints.You can learn more about the 7 Don’t Quit Rules here.
Thanks to this checklist, your tiny home is ready! There is nothing more satisfying than conquering messy chaos into orderly joy.
1. SWAY BAR
Even if your RV comes with a sway bar, you may still feel like you’re swaying while driving down the highway. Replacing your factory sway bar or adding a rear sway bar is inexpensive and will definitely improve the stability of your RV.
2. Blind Spot Detection
When you’re backing up or changing lanes, having a blind spot detection system is a proven way to help prevent accidents and injury.
RV Blindspot Motorhome KitCUB’s blind spot detection system makes changing lanes safe and easy.
Easy to install, this system – for use with any motorhome or towable, including fifth wheels – is the most reliable system on the market.
Moving into your second home becomes more enjoyable and comfortable when you have the latest upgrades that make it the perfect fit for you. Protect your investment with a blind spot detection system that lets you focus more on camping and traveling.
For more information on CUBs Blind Spot Detection System, visit our FAQ or contact us today with your questions. If you’re ready to protect your RV, order today.
RV Solar Upgrades
Solar RV upgrades are one of the biggest reasons people decide to buy a motorhome or RV so they can enjoy the freedom of traveling from the comfort of home. For many people interested in boondocking/dry camping, solar is an ideal upgrade.
Installing – or upgrading – solar panels gives you even more freedom to find off-the-grid destinations that won’t drain your propane or batteries, or drain those generators. .
The solar kit you go with will depend on several factors:
3. Device efficacy
If you are using older, less energy-efficient appliances, you may want to consider upgrading or factoring in the energy use of your existing appliances. Even small upgrades such as switching from a laptop to a tablet or to LED lights can reduce consumption and increase the life of solar batteries.
4. Use of the Device
Understanding what – if any – devices will be running continuously (for example, a refrigerator) is important in choosing the right solar kit for your RV. An RV with equipment that will be running continuously will require more robust systems with higher capacity battery banks.
5. Solar output
Different geographic locations, weather and time of year can all affect the output of your solar panels. Consider these things when deciding on a kit to determine if you may need tile mounts to adjust the panels for maximum sun exposure, or if you need more than your solar panels. Other aids are needed to get the most out of it.
6. Battery bank capacity
Depending on the devices you’re using, you’ll want to have a clear understanding of your energy needs and calculate the number of hours you need to have a full battery bank. This will help you avoid excessive, unnecessary expenses while also giving you the best amps to run everything off-grid.
Keep in mind that not all solar products are ideal for RVs/campers/motorhomes so before deciding to invest in a system, make sure the warranty covers the panels on mobile units.
Smart technology for your RV
The Internet of Things (IoT) gives RV and motorhome owners the tools to monitor everything from motion to battery life, temperature, humidity, and GPS tracking while their RV is in storage. There are many options for mobile network-connected security and monitoring systems that help owners monitor and protect their mobile investments.
RV Whisper, which uses IoT technology, gives you the ability to remotely track many things in your RV, including the vehicle’s temperature (especially if you have pets), your refrigerator The temperature inside, your current level in the holding tank, and the condition of your batteries, charging system, and/or solar panels. Perhaps most importantly, you can also remotely secure your RV with motion sensor alerts.